What Is Reed Gapping? The quick answer… it’s a way to massively increase the performance of your harmonica. Why might that be helpful? Read on…
I’m a Caveman
When I was a kid I was very uncoordinated to the point where I had to do all kinds of therapies to handle everyday basic things. The doctors tested me and advised my parents I would do very well with a small musical instrument that was portable. True story! Still, it took about 10 more years for me to find the harmonica.
The point is, even though you probably wouldn’t think me uncoordinated when interacting with me, I am still EXTREMELY uncoordinated. When I say, “my wife completes me”, what I mean is, after I struggle for a half an hour trying to do something, I hand it over to my wife and she does it in one second.
But my wife wasn’t in the picture when I started gapping my harmonica reeds. I had to do it by myself.
Nowadays, I send my harps out to a professional harp mechanic who does it for me, but when I was in my twenties and thirties making a living as a performing harmonica player, the money I might budget for a harp mechanic generally went to the ramen noodles.
So when I knew I HAD to gap my reeds, I set out to learn it myself. Since I am not only uncoordinated but also can’t-change-a-tire not mechanical, I call my gapping style “caveman gapping”.
Why Gap Reeds?
When I was 18, Rick Estrin, one of the best traditional blues harmonica players, showed me how to overblow a note.
This is notable because overblows did not become popular until 1985 and so virtually none of the harmonica playing before that year utilized overblows. So, even though Estrin has lived past 1985, he is a traditionalist and would NEVER overblow in a public performance. Perhaps I am revealing a secret, apologies Rick!
What are overblows? Overblows are kind of the opposite of bends.
Bends take a note that is built into the harmonica and make it go lower in pitch by altering the shape of the mouth. Overblows take a note that is built into the harmonica and make it go higher in pitch by altering the shape of the mouth.
The word overblow is a misnomer. It suggests you blow hard. It is a very gentle, precise technique.
It suggests you have to blow. You can overdraw. Overdraws are considered difficult so the running joke is, “the only thing I have ever overdrawn is my checkbook.”
Bends occur on the draw notes from hole 1 through 6 and the blow notes from holes 7 through 10. Overblows occur on the blow notes from holes 1 through 6 and the draw notes on holes 7 through 10.
Therefore if you are blowing in holes 7 through 10 and the note alters, you are NOT overblowing, you are bending.
There are notes that every cross harp player wishes they could play. With overblows they are all there!
If you have control of all of your bends and overblows you can play all of the keyboard notes for a 39 note range.
Therefore, like a keyboardist can play any style of music in any key, so can the diatonic harmonica player.
This seemed like a pretty cool option to me. Instead of being restricted to playing in keys and styles of music that utilized the blow, draw and bent notes and being left out of songs using notes that I couldn’t play, I could join in on everything! WOW!
Every Harp is a Unique and Special Snowflake
So I set out to learn overblows. Well, as any good teacher can tell you, some of the overblows are pretty easy and some are hard. This is just like some of the bends are easy and some are hard.
Even if you can get every bend on your C harp, it doesn’t mean you can get every bend on your G harp.
In other words, every hole on every harmonica requires a slightly different embouchure (how you hold your mouth) to sound good.
This truism goes so far that if you had two Special 20s in the key of C, every hole on one harp would require a slightly different embouchure than the SAME hole on the other harp!
How can this be? We will return to this question later. You need to understand what gapping is first.
What Is Gapping?
Later on in this article, I will explain how to remove the cover plates. Re-read this section after the cover plates have been removed.
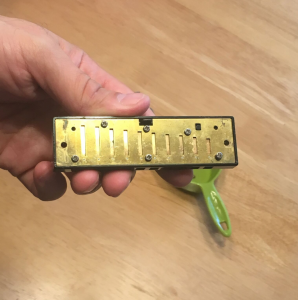
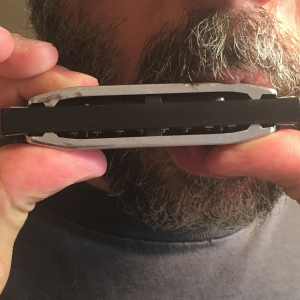
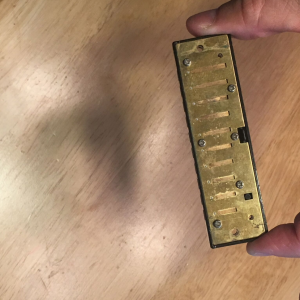
If you took the cover plates off your harmonica, you would see the comb, where the holes are.
On each side of the comb is a reed plate, with 10 reeds attached to the reed.
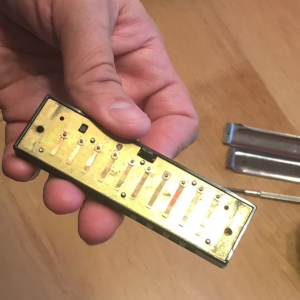
Each reed is attached by one rivet and the other side floats free.
It is called the “free floating reed system” and it is around 5,000 years old. Look up the Chinese instrument “the sheng” to see the harmonica’s ancestor.
By plucking or sending air over the free side, it causes a vibration and music is made.
On the top of the comb is the blow plate. These reeds are on the inside of the plate.
On the bottom of the comb is the draw plate. These reeds are on the outside of the comb.
This means that, for most mechanical work on a harp, the blow reeds are a pain to work on because you have to take the plate off of the comb. However, for caveman gapping, you can leave it on.
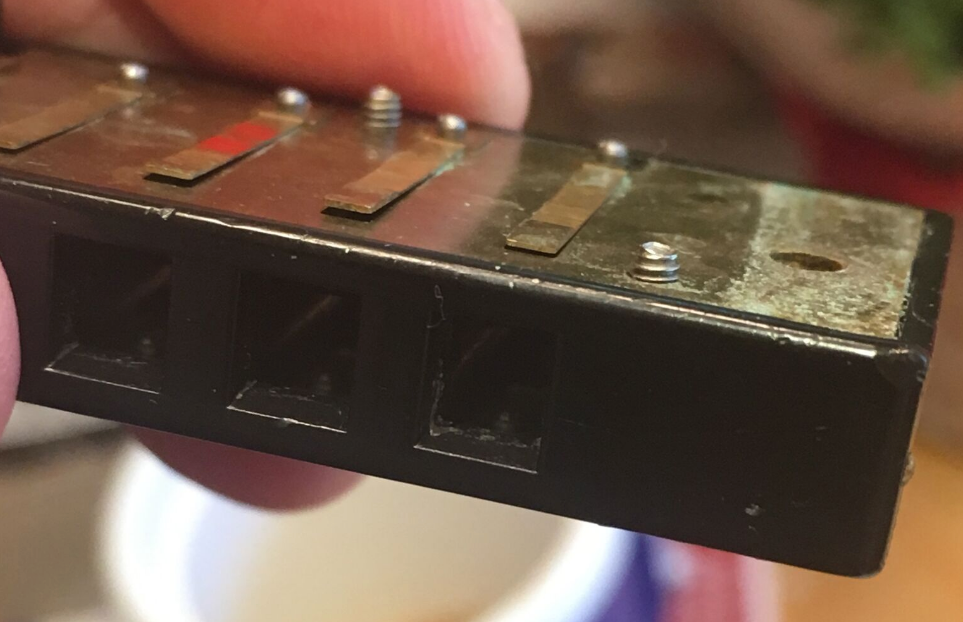
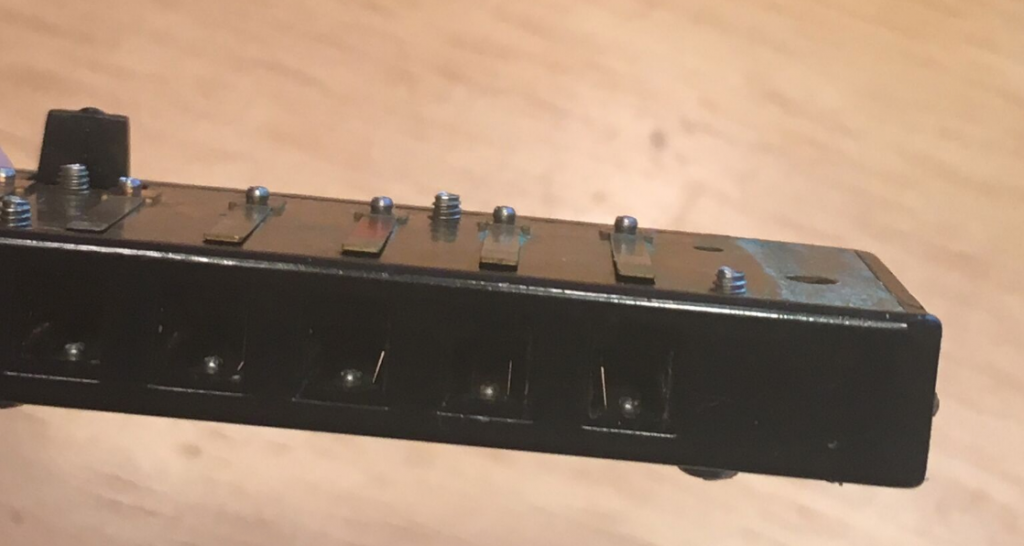
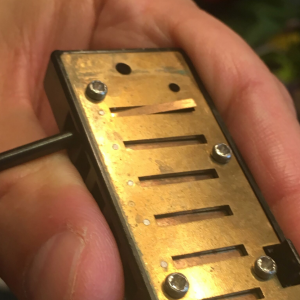
If the cover plates are off, you could switch the harp upside down so that the draw plate is on the top. Then you could look at the plate at eye level. You would see that there is a distance between the reed and the reed plate.
That distance is called THE GAP.
Altering the gap is called GAPPING.
GAPPING IS NOT JUST FOR OVERBLOWS.
Although I began exploring gapping because I wanted to overblow, gapping has MANY uses.
Gapping is the number one troubleshooting move for almost ANY harmonica problem.
If you cannot bend on your new C harp on hole 3 but you could really control it on your previous C harp, look at the gaps on holes 2, 3 and 4.
Are 2 and 4 tight and 3 is loose? Tighten 3. Are 2 and 4 loose and three is tight? Loosen 3. Suddenly, it should bend fine.
This technique of evening out the gaps doesn’t just help bending issues. It is my first move for almost ANY harp problem. It is not a cure-all, but it is pretty close.
Gapping will also help the harmonica respond to your style of playing. If you blow soft, gap tight. If you blow hard, gap loose.
Out of the Box Harps are Poorly Gapped
The standard out-of-the-box harmonica should bend well in the hands of a player who has control of his bends. A well-gapped harp will make those bends loads easier. It will also make the bends easier for someone learning to control their bends, but it is not a cure-all. Gapping cannot fix poor technique!
The standard out-of-the-box harmonica will almost ALWAYS give even the best player trouble when trying to overblow. To overblow well, both reeds have to be gapped very tight. Learning overblowing without gapping both reeds tightly is a losing battle.
A well-gapped harp will make learning overblows easier, but it is not a cure all. Gapping cannot fix poor technique.
So back to WHY do two of the exact same model and key harps require different embouchures on the same respective holes?
In order for a harp company to make the most profit, they have to skimp on quality. The amount of money spent on gapping reeds in the factory must be very little because gaps range wildly.
Advanced harp mechanics have opinions on how to gap each reed and have mechanical knowledge about how to gap very precisely. I am not one of those mechanics.
You Don’t Need to Be a Great Mechanic
My caveman mechanics enable me to create a harp that bends and overblows at a professional level. I have my harps built by a great mechanic. If my souped-up harp breaks today and I have a gig tonight, I can soup up a harp by myself.
Are there other mechanical techniques that will help make overblows easy? Yes.
Are there other techniques that will make bending and all-round playability on the harp better? Yes.
But gapping is the most CRUCIAL mechanical technique towards creating a great playing harp, in my opinion.
How to Gap
I heartily recommend using an old harp for experimentation. The odds of you breaking a reed while learning are low, but it would hurt if you did.
If you are using a harp you care about, be aware that even if you do not break a reed during gapping, you will likely RADICALLY alter the responsiveness of the reed.
In other words, if you have a harp you just LOVE, this is not the one to learn on.
Before You Gap
Play on your harp as is. Get a sense for how each hole is responding to you. Try and remember how the holes feel. You will know gapping success if the hole you gap still plays nicely but has a different feeling to how it played before you gapped it.
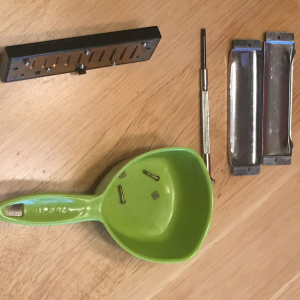
Prep Work
You will need a table. I recommend doing this in a room without a carpet. It is so easy to lose the little nuts and bolts.
You should have good lighting.
Consider having a video camera or just a camera with you. Until you learn the physical layout of the harmonica, it is good to have a record of what order you did things so you can put it back the same way.
Caveman gapping does not involve taking the reed plates off the comb, so this is really unnecessary for this technique. However, if you ever use a technique that involves taking the reed plates off the comb, keep good notes!
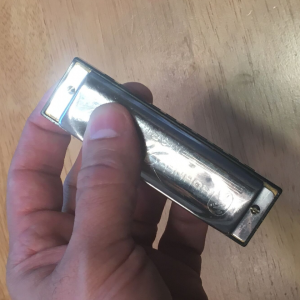
Take off the Cover Plates
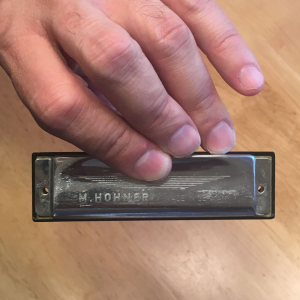
At this point, we separate from people I can help and those I can’t. If you own a standard Marine Band, I don’t understand how you remove the cover plates by extricating those tiny nails and then replacing them when rebuilding the harp. You are on your own.
If you can do that without my help, the rest of the gapping information still applies.
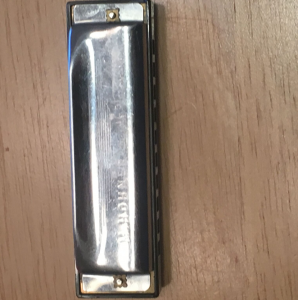
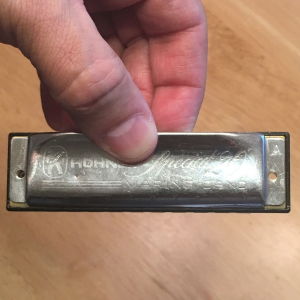
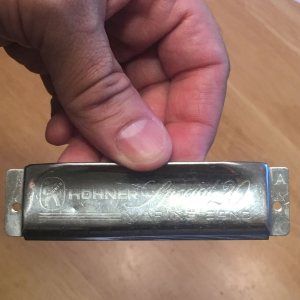
If your harp has bolts, such as a Special 20 does, we are still in business.
I will admit to just now being schooled by my wife. Apparently, what I always have referred to as a screw is a bolt and a screw is slightly different.
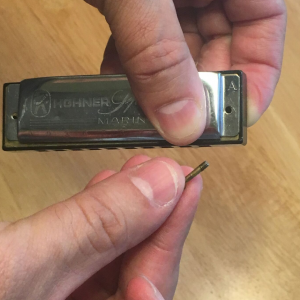
You will need a flat-head eyeglass screwdriver.

If you ever intend to take the reed plates off the comb, you will need a Phillips-head eyeglass screwdriver. It is not necessary for gapping.
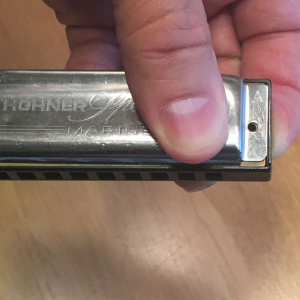
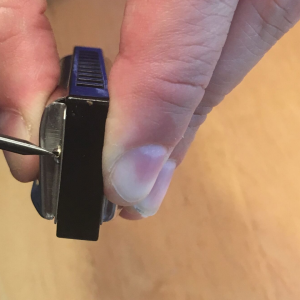
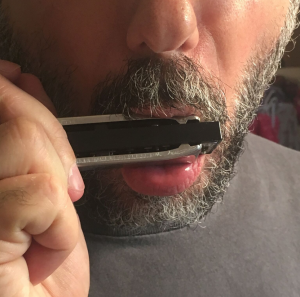
Keep the harmonica over the table.
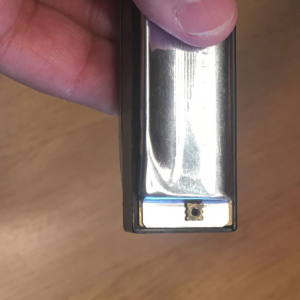
The nuts are on the bottom of the harmonica.
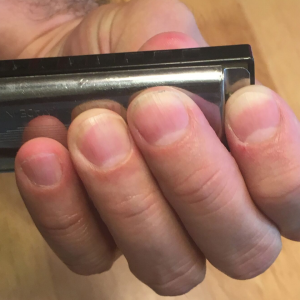
Place the pad of your left index finger under one of the nuts, keeping it in place. Your middle finger, ring finger and pinky should be holding the bottom cover plate to the harp.
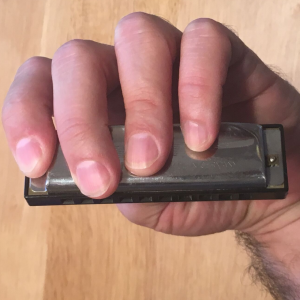
Your left thumb should be holding the top cover plate on the harp.
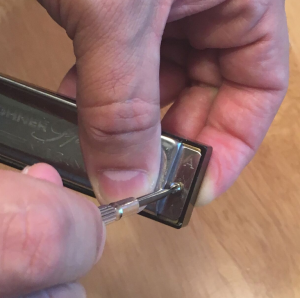
Take the flat-head screwdriver in your right hand and unscrew the bolt by turning the screwdriver to the left (anti-clockwise).
Even I know lefty loosey, righty tighty.

Place the bolt and nut safely to one side of the table, perhaps in a bowl. Repeat with the other bolt and nut.
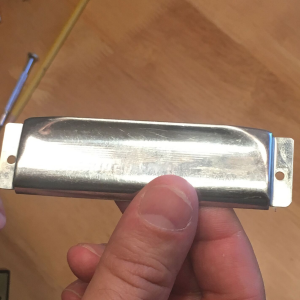
Take off both cover plates.
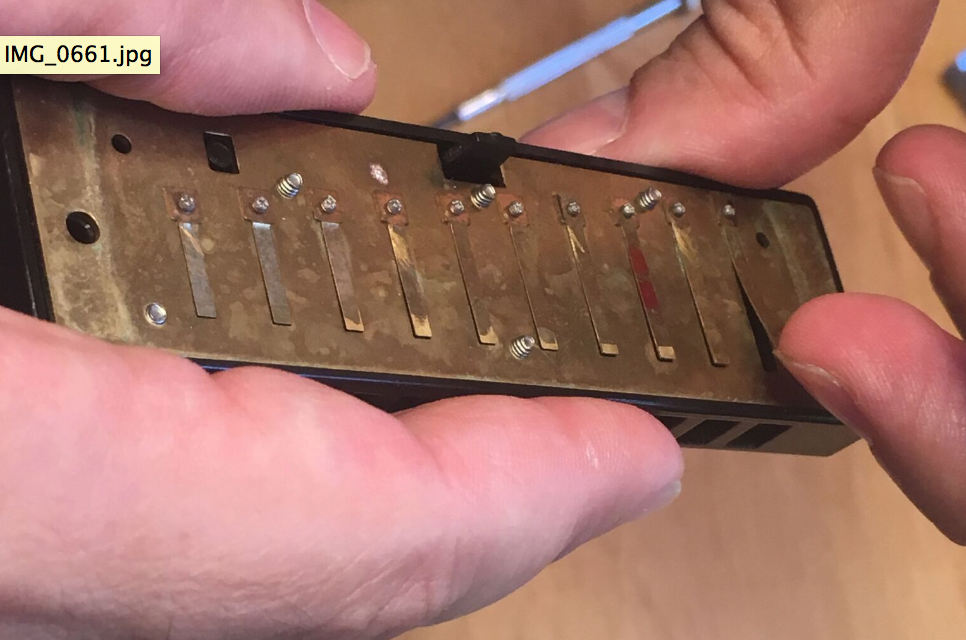
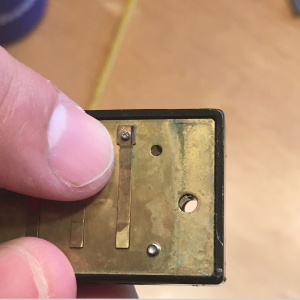
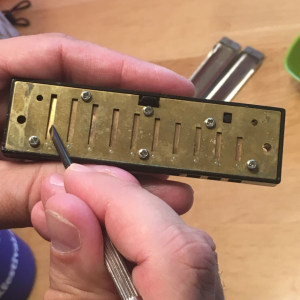
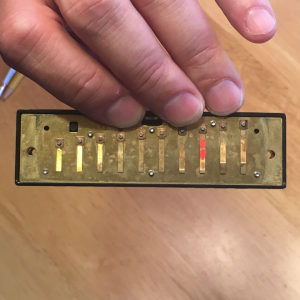
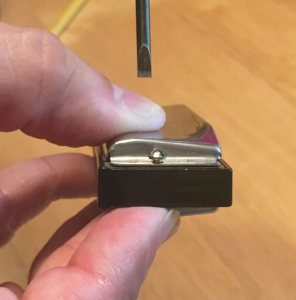
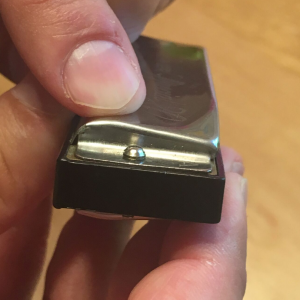
Observe the Current Gaps
Turn the harp upside down. The draw reeds should now be on top. Remember, you know they are the draw reeds because they are raised outside of the plate.

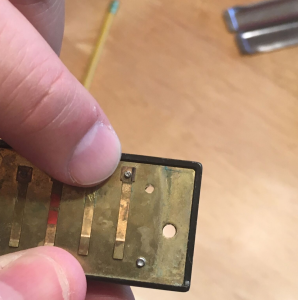
Bring the harp to eye level. Notice the wide differences between the gaps. Choose a big reed from holes 1 through 4 with the largest gap.
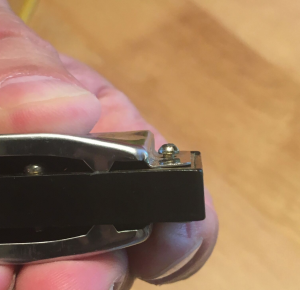
See the rivet end of the reed? Do you see where the rivet square is? YOU DO NOT WANT TO MESS WITH THIS!
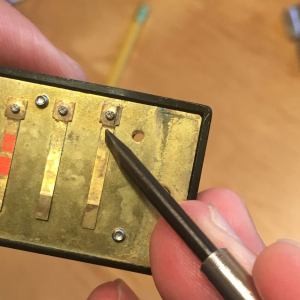
Visually divide the reed into fifths. See the fifth that is closest to the rivet reed? YOU DO WANT TO MESS WITH THIS!
Take the point of your screwdriver and push against the reed. If the reed is properly centered, the reed will dip into and even below the reed slot.
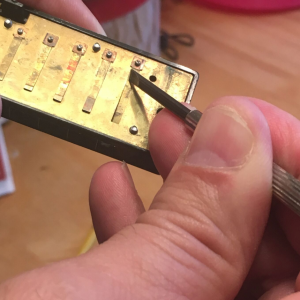
WARNING: If you push too far or too hard YOU CAN BREAK A REED.
Lift the screwdriver off. Look at the gap. Is it tighter? For now, SUCCESS!
Place the cover plates on the harp. You do not need to screw the nuts and bolts back on at this time.
Draw into the hole you have gapped. Does the note easily come out? SUCCESS!
Does the note not play? You have gapped too tightly and need to gap in the opposite direction.
Does the note make sound but give some resistance as if to act like a whiny child saying, “I don’t WANNA play right now! OK, I’ll play.” So, first there is some sound but you feel physical resistance and then it plays normally? You have gapped too tightly and need to gap in the opposite direction.
If you need to gap in the opposite direction, either because you have gapped too tightly or the reed came from the factory gapped too tightly, you can gap a draw reed looser without taking the reed plate off the comb.
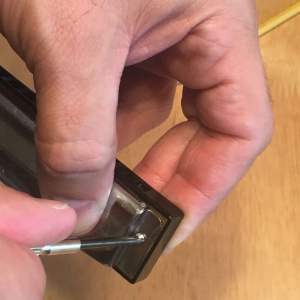
Place the screwdriver inside of the hole you want to gap. Find the fifth of the reed that is closest to the rivet square and push outward.
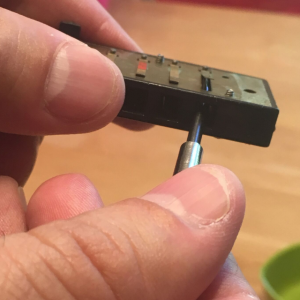
Then place the cover plates back on and check playability.
When dealing with a blow reed, gap it looser by pushing on the reed from the outside of the plate.
Gap tighter by placing the screwdriver in the hole and pushing outward.
Overblow gapping parts 1 and 2
Part 1. Good Gapping Does Not Insure a Good Overblow
For overblow gapping, remember that an overblow is a technique that requires an advanced embouchure. I have taught many beginners to overblow, but having control of your overblows to make them have a nice tone and be in pitch is difficult.
Remember, each overblow will require a slightly different embouchure.
In general, I recommend students have real mastery of high-note blow bends and be able to really rip a great solo in the Jimmy Reed first-position blues style before even attempting overblows.
Therefore, even if you gapped your harmonica perfectly for an overblow, it is likely you would not be able to produce an overblow or that it would sound bad.
I recommend getting a player who knows how to gap and overblow well to gap your harp for you. That way, you know that if the harp were gapped properly, it would overblow well in the hands of a player who has control of overblows.
In other words, until you have control of overblows, it is very difficult to sense if your gap is correct for an overblow. Learn the overblow technique first and how to gap for overblows second.
Part 2. How to Gap for an Overblow
Once you can overblow well, know that gapping for an overblow requires BOTH the draw and blow reed to be very tightly gapped. Essentially you want both reeds gapped as tightly as possible to where both reeds still play with no trouble whether or not you are blowing, drawing, bending or overblowing.
It is important to be able to get all these sounds to respond right away, no matter what note or silence immediately preceded that sound. In other words, go over the entire harp and then go into the hole you are gapping and make sure it responds well no matter what precedes it.
If you get that whiny kid feeling, “I don’t WANNA play! OK, I will.” for any sound on the hole you are working on, you have gapped too tightly.
However, I recommend gapping to the point of the whiny kid and then gapping in the loosening direction just a smidgen until everything plays well. Correct overblow gapping is as tight as possible without any resistance.
Now remember, when you gap the harp tightly, the harp no longer responds well to hard playing. The beginning overblow player generally will have to readjust their style to learn how to play softly.
Advanced harmonica mechanics can make your harp overblow like a dream and still respond to hard playing.
Replacing the Cover Plates
Make sure the blow reeds are on top.
Remember, the blow reeds are on the inside of the reed plate.
Place the cover plates on the harp. Make sure the cover plate with the numbers is on the top.

Place the bottom cover plate on the harp. Remember, the draw plate is on the bottom and the draw reeds are on the outside of the plate.
Pick up a nut.

Center it under the hole the bolt goes through.
Place the pad of your left index finger under the nut, keeping it in place. Your middle finger, ring finger and pinky should be holding the bottom cover plate to the harp.
Your left thumb should be holding the top cover plate on the harp.
Use your right index finger and thumb to place the bolt in the hole.
Keep pushing the nut onto the bottom cover plate with your left index finger.
Do not release your left index finger from the nut until you have screwed the bolt into the nut.
Use the screwdriver to screw the bolt to the right (clockwise).
DO NOT TIGHTEN THE BOLT ALL THE WAY. Very close to all the way is good.
Repeat with the other bolt.
Hold the cover plates tightly with your fingers. Play the harp.
Do your lips connect comfortably to the comb and cover plates the way they normally do? No? Readjust the cover plates and try again.
Do your lips feel comfortable the way they normally do? Yes? SUCCESS! Tighten the screws all the way, being careful to keep the cover plates in the same location.
After the final tightening, recheck the harp to make sure it still feels comfortable with your lips like it normally does. Play the gapped hole.
Does it respond easily? SUCCESS!
Compare to Your Memory
Remember how the gapped hole played before you gapped it? Now play your gapped reed. Bend or overblow if applicable. Move to all the notes in your gapped reed from other places on the harp and directly to those notes. Can you sense a difference in responsiveness?
If yes,
BIG HONKING SUCCESS!
If no, at least you didn’t break your harp. Try again.
Learn Through Experimentation
Once you get a sense for how to do it, experiment. Make big gaps and little gaps. Know there will be different results on higher and lower pitched harps. Know that the same gapping on a low reed will have different results on a high reed.
Try and get a sense for what tight and loose gapping does for you and also get a sense for when it is gapped too tightly and the whiny kid shows up.
Expect Some Trials and Tribulations
You may break a harp. You may lose your patience. You may create a swear word that has never existed before.
BUT
If I can do it, you can do it.
I hope you’ve enjoyed this as much as I have.
Now to kill a dinosaur for dinner.

Comments
Got something to say? Post a comment below.